
Alt+Tab works until you have too many windows open. I used to lose time hunting for the terminal, browser tab, or Slack conversation I had just used. That was the problem that pushed me toward tiling window managers.
On Linux we have several window managers that allow for different setups. The one I used for years is i3.
Important Distinctions
Before getting into i3, I want to separate a few Linux desktop pieces:
- Display servers: responsible for creating the graphical environment (Xorg, XFree86, X11);
- Login managers: responsible for allowing login to the local system (gdm, lightdgm, cdm);
- Window managers: controls the distribution and decoration of windows (i3, fluxbox, metacity)
- Desktop environment: suite of applications that share the same graphical interface (KDE, GNOME, XFCE)
What is i3
It’s a window manager that supports stacking, tabbed layout, and window tiling, which is what makes i3 so efficient. The tiling layout organizes windows so they don’t overlap, arranging them both vertically and horizontally.
It’s possible to organize your windows in different workspaces, configure shortcuts to open programs with specific sizes, floating windows, and multi-monitor behavior.
The $mod Key
i3 makes use of a modifier key, which by default is ALT (Mod1), but which has been adopted by the community as the SUPER key (Windows key, Mod4). This modifier key is used in conjunction with other keys for shortcuts defined in the configuration file, such as:
# Open terminal
$mod+ENTER

# Close a window
$mod+SHIFT+Q

# Go to workspace 1
$mod+1
I’ll use $mod in the examples below to represent the configured modifier key.
Workspaces
Workspaces are where i3 started to click for me. I treat them as fixed places: browser on 1, communication on 2, code on 3, Spotify on another monitor, and so on.
To switch from one workspace to another, simply press $mod + num where num is the number of the workspace you want to open.
To move a window to another workspace, simply press $mod + Shift + num where num is the number of the workspace you want to send the window to.
Configuring i3
To configure i3, simply edit your configuration file located at ~/.config/i3/config. When running i3 for the first time, you’ll be offered an option to generate a configuration file with some defaults, which is always a good idea to accept, in case you don’t already have a configured file.
The generated file includes useful defaults for shortcuts and window rules. You can also define variables in it:
# Define workspaces
set $console "1: term"
set $browse "2: browse"
set $code "3: code"
set $study "4: study"

# Using variables:
# Shortcut to access workspace $study
bindsym $mod+4 workspace $study

# Associates sublime text to always open in workspace $study
assign [class="^Sublime_text$"] $study
Defining Shortcuts
To define shortcuts for programs, simply use:
bindsym [--release] [<Group>+][<Modifiers>+]<keysym> command
bindcode [--release] [<Group>+][<Modifiers>+]<keycode> command
Some examples of shortcuts:
# Toggle fullscreen
bindsym $mod+f fullscreen toggle

# Restart i3
bindsym $mod+Shift+r restart

# Simulates pressing ctrl+v when pressing $mod+x
bindsym --release $mod+x exec --no-startup-id xdotool key --clearmodifiers ctrl+v
Defining Rules for Windows
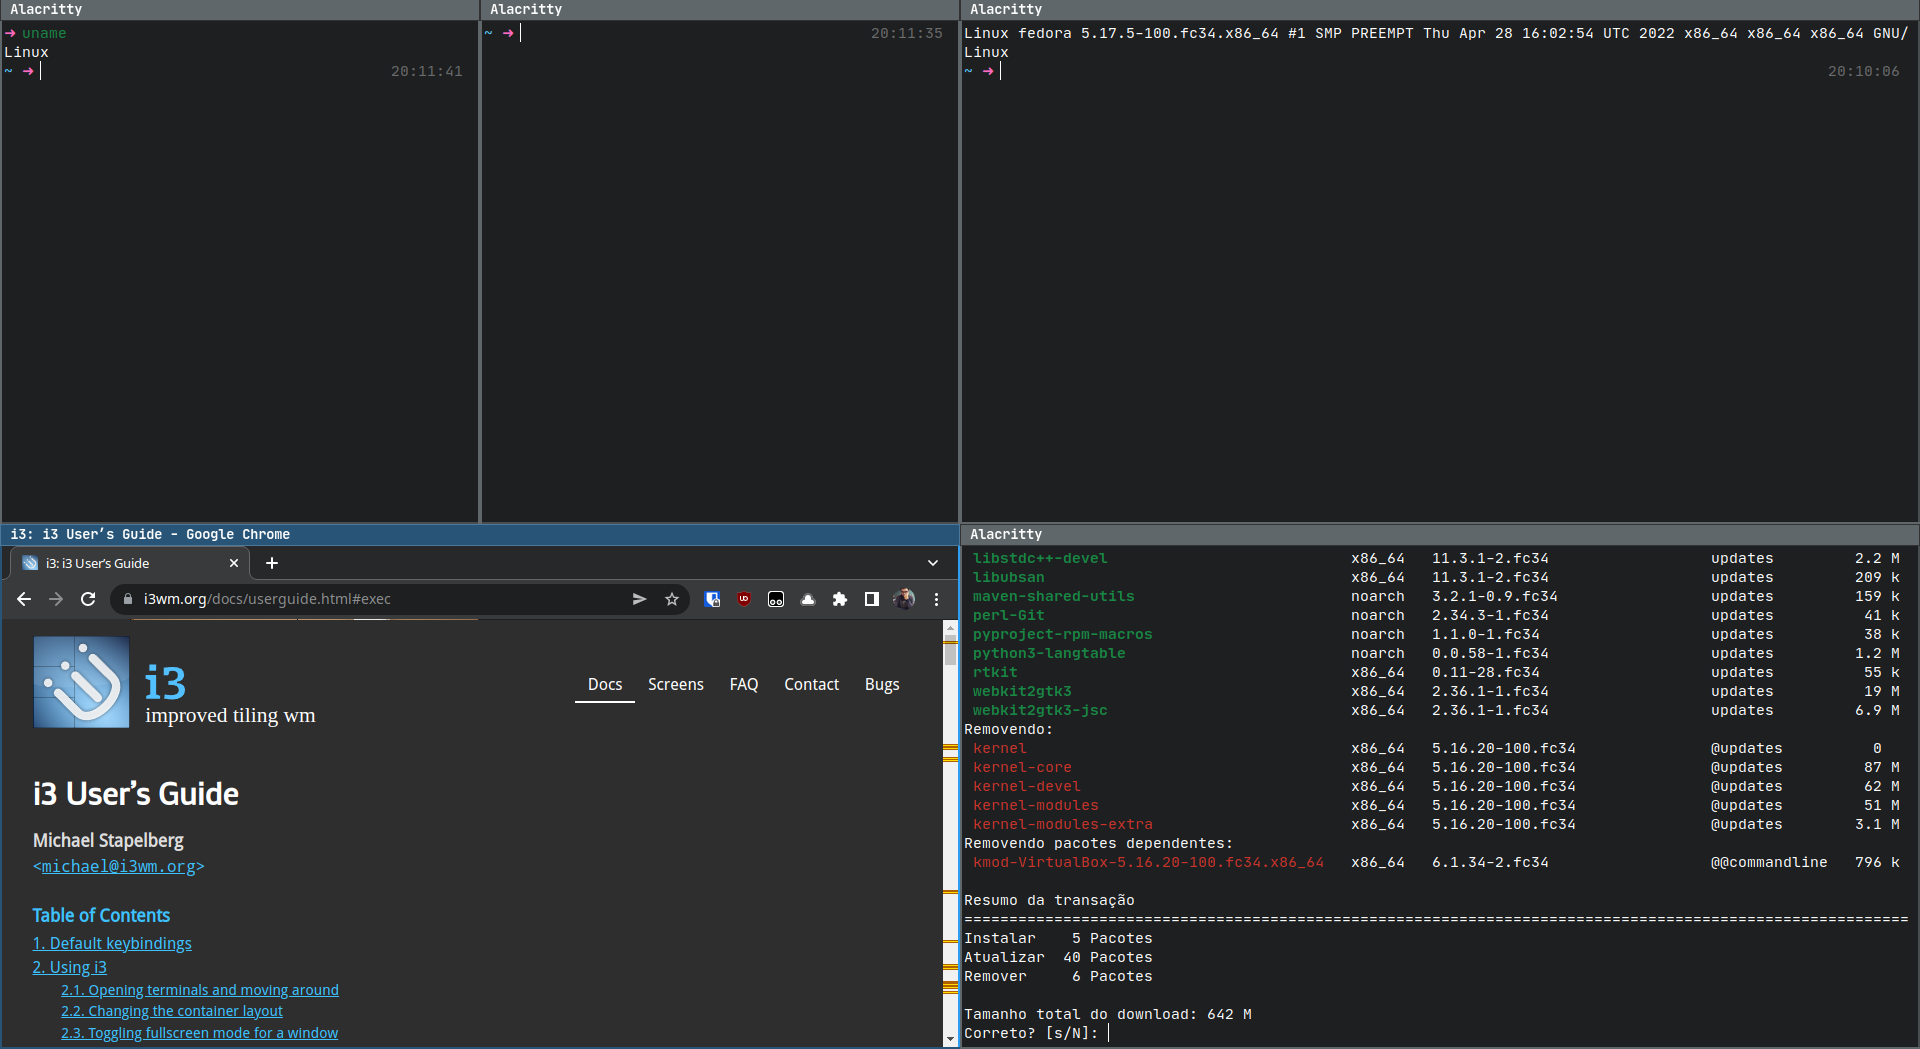
In i3, it’s possible to specify rules for different windows such as behavior, size, and where the window will open. To do this, you need to have one or more of the following window properties: title or class. To find out the title or class of a window, we can use the xprop tool which, when executed in the terminal, will change your cursor to a cross and you should click on the window you want to get information about. After that, the following output will be presented in the terminal, with window information.
**WM_CLASS(STRING) = "Alacritty", "Alacritty"**
XdndAware(ATOM) = BITMAP
_MOTIF_WM_HINTS(_MOTIF_WM_HINTS) = 0x2, 0x0, 0x1, 0x0, 0x0
_NET_WM_NAME(UTF8_STRING) = "Alacritty"
WM_NAME(STRING) = "Alacritty"
The bold text represents the class. In this case, we can create a rule for windows of the Alacritty class to behave in a floating manner and be moved to workspace 4 with the following configuration:
for_window [class="^Alacritty$"] floating enable, move container to workspace 4Some other examples:
# Adds 1 pixel border to all windows removing decoration
for_window [class=".*"] border pixel 1

# Disables floating for the window and makes it fullscreen
for_window [class="^deadcells$"] floating disable, fullscreen enable

# Specifies the size the window should open, enables float mode and centers it
for_window [class="^terminal"] resize set 900 600, floating enable float, move position center
Defining Shortcuts for Programs
To execute a program, the following syntax is used:
exec [--no-startup-id] <command>Examples:
# Shortcut to start google chrome
bindsym $mod+g exec google-chrome

# Opens i3 settings in sublime
bindsym $mod+i exec --no-startup-id subl ~/.config/i3/config

# Changes focus, splits container vertically and starts terminal
bindsym Control+Mod1+d focus child; split v; exec --no-startup-id i3-sensible-terminal
Associating Windows to Workspaces
Associating windows to workspaces is where the mental map pays off. If the browser always lands on workspace 2, Slack on 8, and Spotify on 7, you stop searching for windows and start jumping directly to them. Add rules like for_window, but with a slightly different syntax:
assign <criteria> [→] [workspace] [number] <workspace>
assign <criteria> [→] output left|right|up|down|primary|<output>
Examples:
# Associates google chrome to always open in workspace number 2
assign [class="Google-chrome" window_role="browser"] 2

# Associates PHPStorm to always open in workspace number 3
assign [class="jetbrains-phpstorm"] 3

# Associates google chrome to open on the monitor to the right of the current one
assign [class="Google-chrome"] output right

# Associates google chrome to open on the primary monitor
assign [class="Google-chrome"] output primary
There are many more i3 configuration possibilities than those mentioned here. To see more, check out the documentation here.
Advanced: How i3 Works
In i3, all information about workspaces and windows is stored in a tree. The root node of this tree is the X11 root window (display server), followed by containers, workspaces, and finally the windows themselves.
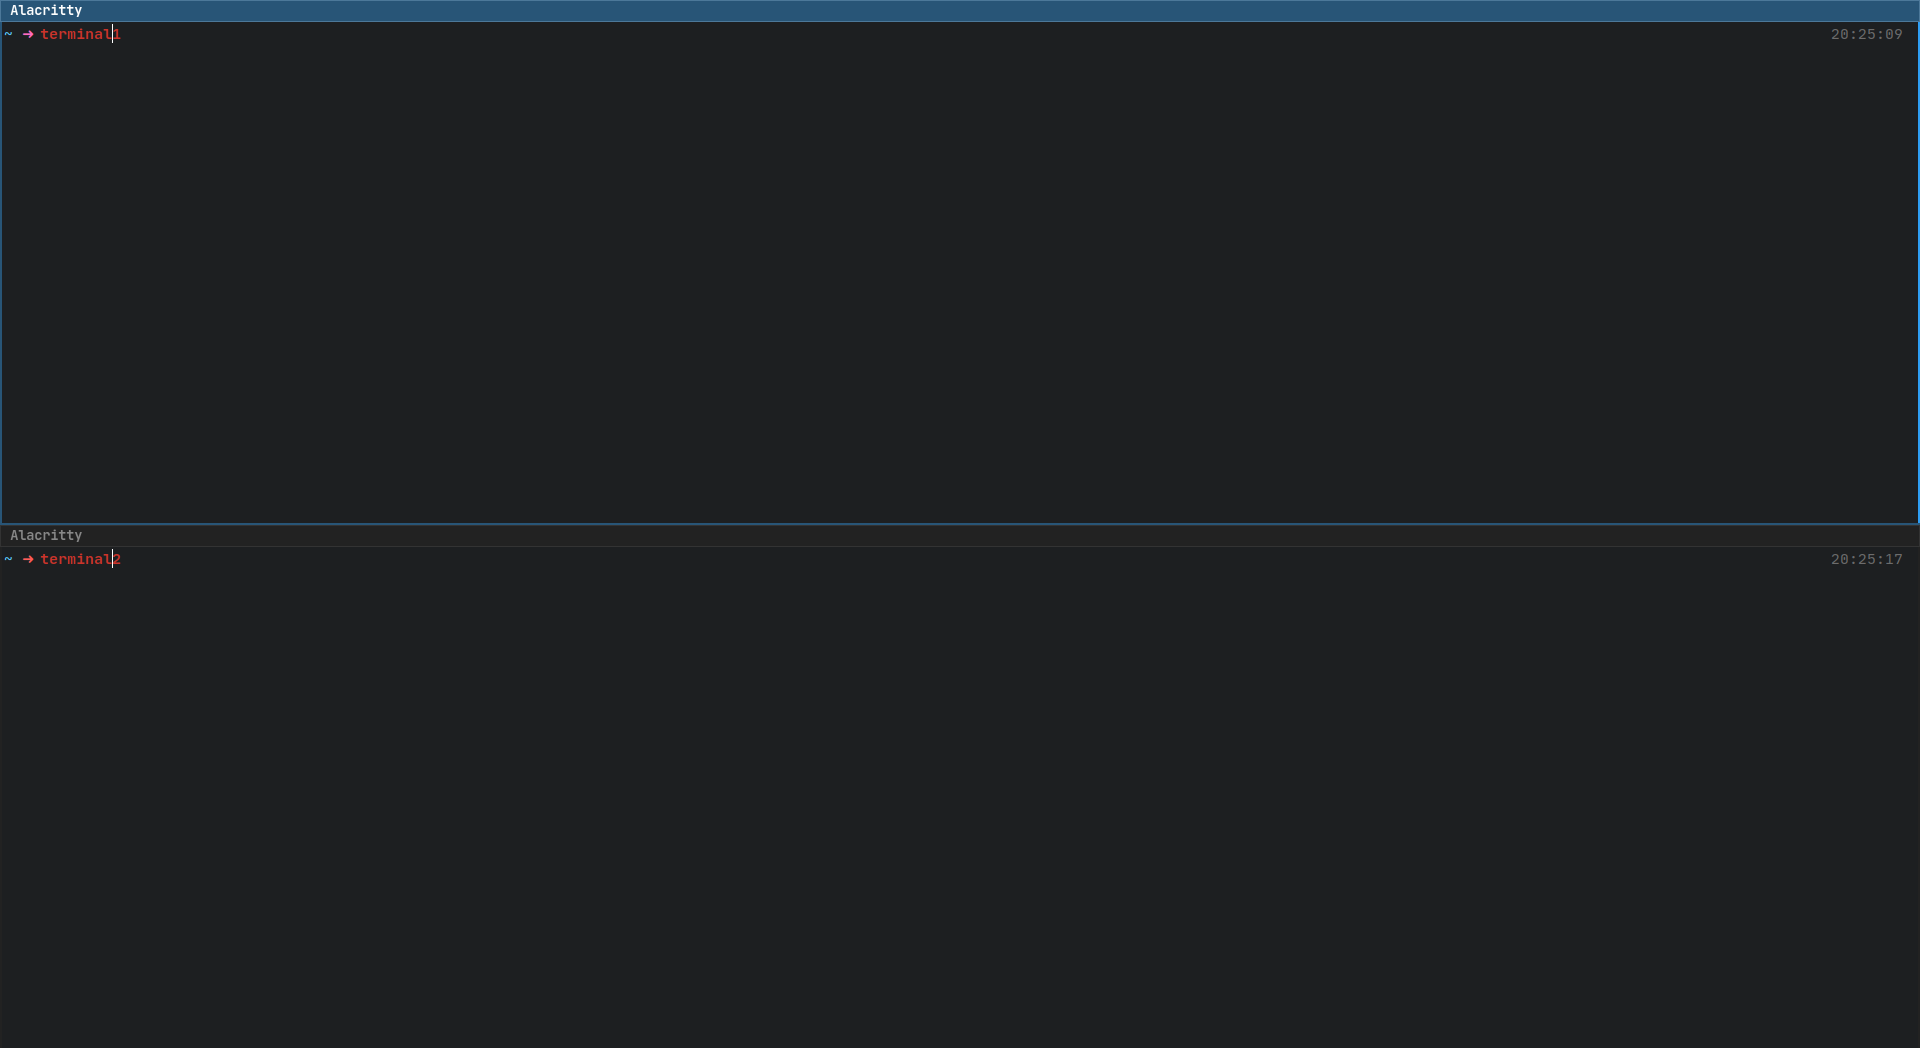
Containers can have other containers or windows within themselves. Each container has an orientation (horizontal, vertical, or unspecified) and the orientation depends on the layout the container is in. Below is an example of a container with splith, two windows:
And an example of how it would be represented in the tree:
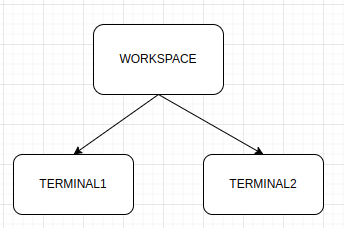
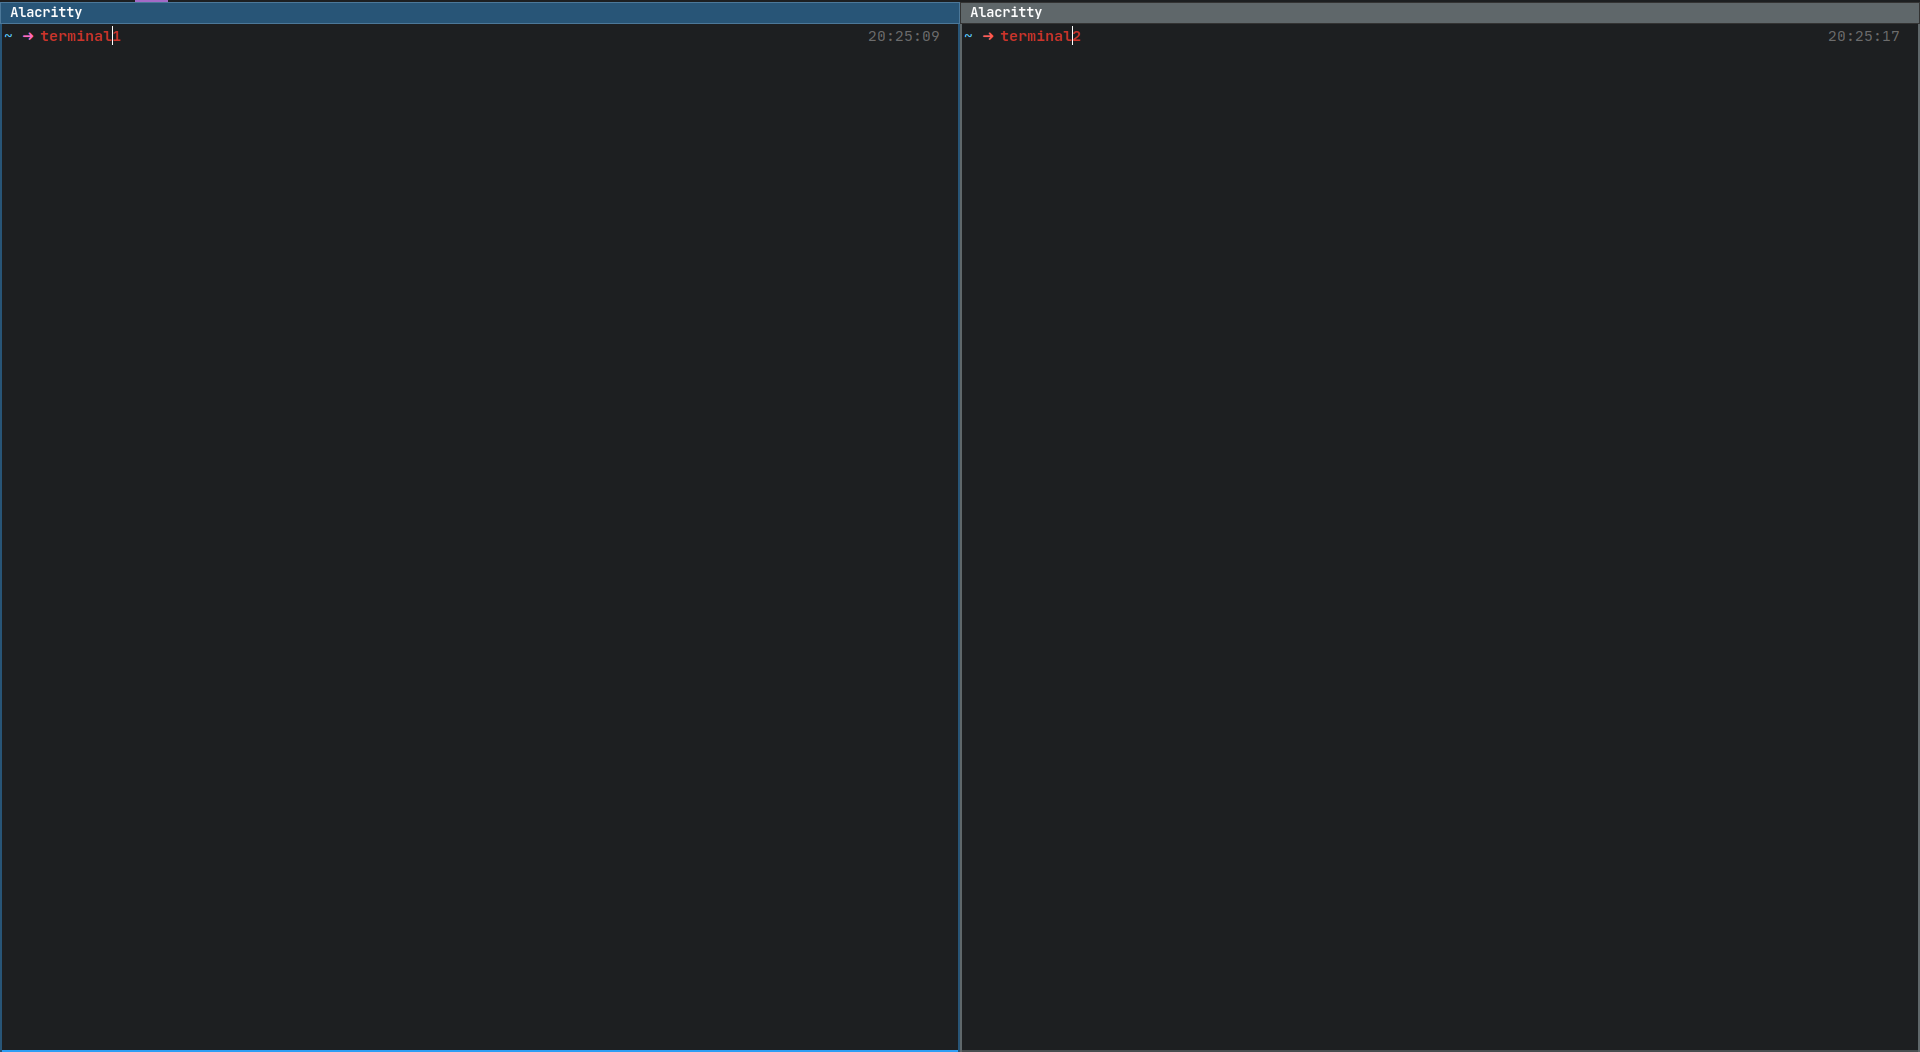
Above we have an example of when we start i3 with a single monitor, we have a single workspace and two terminal windows. The default layout for this workspace is called SPLITH. If you decide to change the layout to SPLIV (vertical) and open two terminals, you’ll end up with something like this:
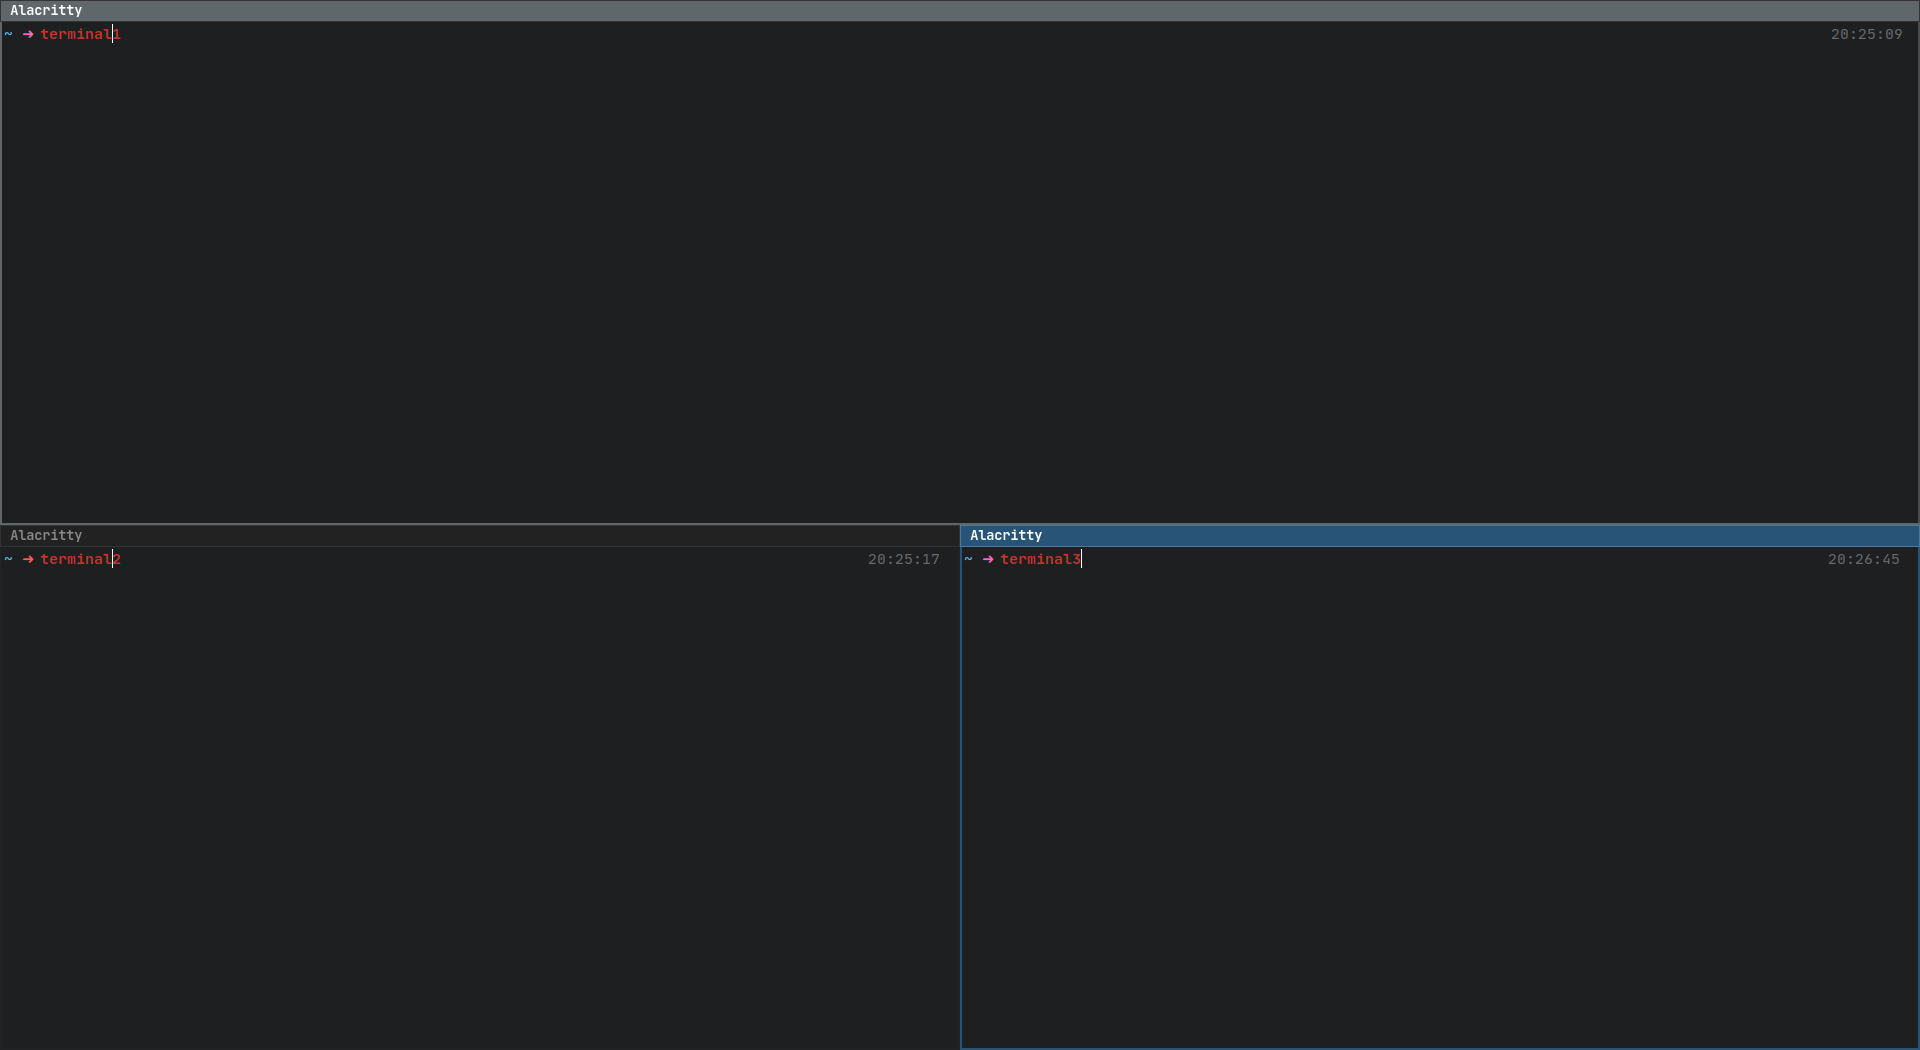
i3 can split any container. In the previous example, if you want another terminal to the right of TERMINAL2, focus TERMINAL2 and run SPLITH ($mod+H):
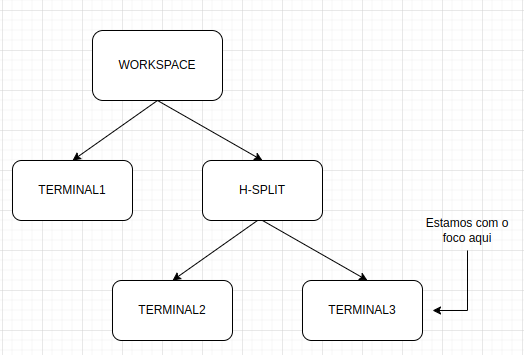
Example of what the tree would look like:
i3 Helps, But Doesn’t Work Miracles
That tree model explains why i3 can rearrange windows so predictably.
i3 helped me move faster, but only after I spent time shaping it around my workflow. The config work is the tradeoff: you get a desktop that behaves the way you expect because you wrote the rules yourself.
For reference, these are the docs I kept around while learning i3:
Moved to Wayland?
I’ve since migrated from i3 to Niri on Wayland. If you’re considering the switch, check out my NixOS + Niri setup.
Comments